Saturday, July 9, 2016

Module 2: Chapter 12 - Stage 2

The following pages are all from my sketchbook devoted entirely to gathering ideas for designing my functional, three dimensional embroidered item.

Working and playing with the 3D shapes in stage 1 (previous post) generated a few potential ideas. The two which seemed to hold the most interesting possibilities for working within a fairly limited colour palette were baby blocks made from pelmet vilene with each side displaying a variety of blackwork and other tonal hand and free machine embroideries; and bags. In the end I chose to work with bags, having discovered an interesting link between Native American Indian / Aboriginal medicine bags and a close relative to one of the animals I was researching, with an emphasis on the markings on his shell - the tortoise and turtle.

Native American Indian mothers sometimes make fetish medicine bags for their babies. These bags are made in the shape of animals whose attributes the mothers hope their little ones will develop. Girls fetish bags are made in the shape of turtles. Turtles are known for their long life spans. Turtles also symbolize Mother Earth, and are ancient symbols of longevity and patience. They only carry what they need - their shell.
Boys fetish bags are made in the shape of lizards. Lizards and snakes are known for their stealth and speed, qualities mothers wish for their male children. These bags function as good luck charms. When the child grows older the bags are sometimes attached to the child's belt.


Saturday, May 7, 2016

Chapter 12, Stage 1

3-D shapes


The four 3-D shapes above were made from felt.
Top left is a cube.
Bottom left is a cylinder.
Bottom right was created from 3 equilateral triangles stitched together to form a pyramid.
Top right was created from 3 squares stitched together to make a triangular tunnel shape.

Looking back over sketches drawn earlier in this module I noticed the rather interesting mis-shapen 'squares' - 4 turned sideways makes a 'diamond' of sorts.


I am especially intrigued by the number of different variations possible when combining squares and rectangles together to generate composite 3 D shapes. I began experimenting and developing the following 3D shape:


I began by cutting 9 small rectangles, each measuring 1 3/4 inch by 1 1/4 inch. Since there were so many tiny pieces of fabric I decided to forgo the pleasure of hand sewing them together, much as I enjoyed stitching by hand for the initial 3 D samples, and instead seamed them together using a narrow machine zigzag.


Next step was to start combining the resulting triangles:

(i) stitched 2 triangles together, this time by hand:

(ii)


(iii) 3 triangles joined together along the same seam:


(iv)
Tessellated triangles:


Tuesday, April 5, 2016

Module 2, Chapter 11, Stage B


This larger sample was created using my dyed, decorated, monoprinted and stitched fabrics. I began by stitching strips of fabric together, divided the pieced fabric into 3 sections based on the Fibonacci sequence. I kept the smallest piece as it was, cut up the second section and re-pieced it, and cut the third section into much smaller pieces before reassembling. Finally the 3 sections were joined together, with most seams facing to the front. The seams were frayed to add interest.

Wednesday, March 30, 2016

More shibori

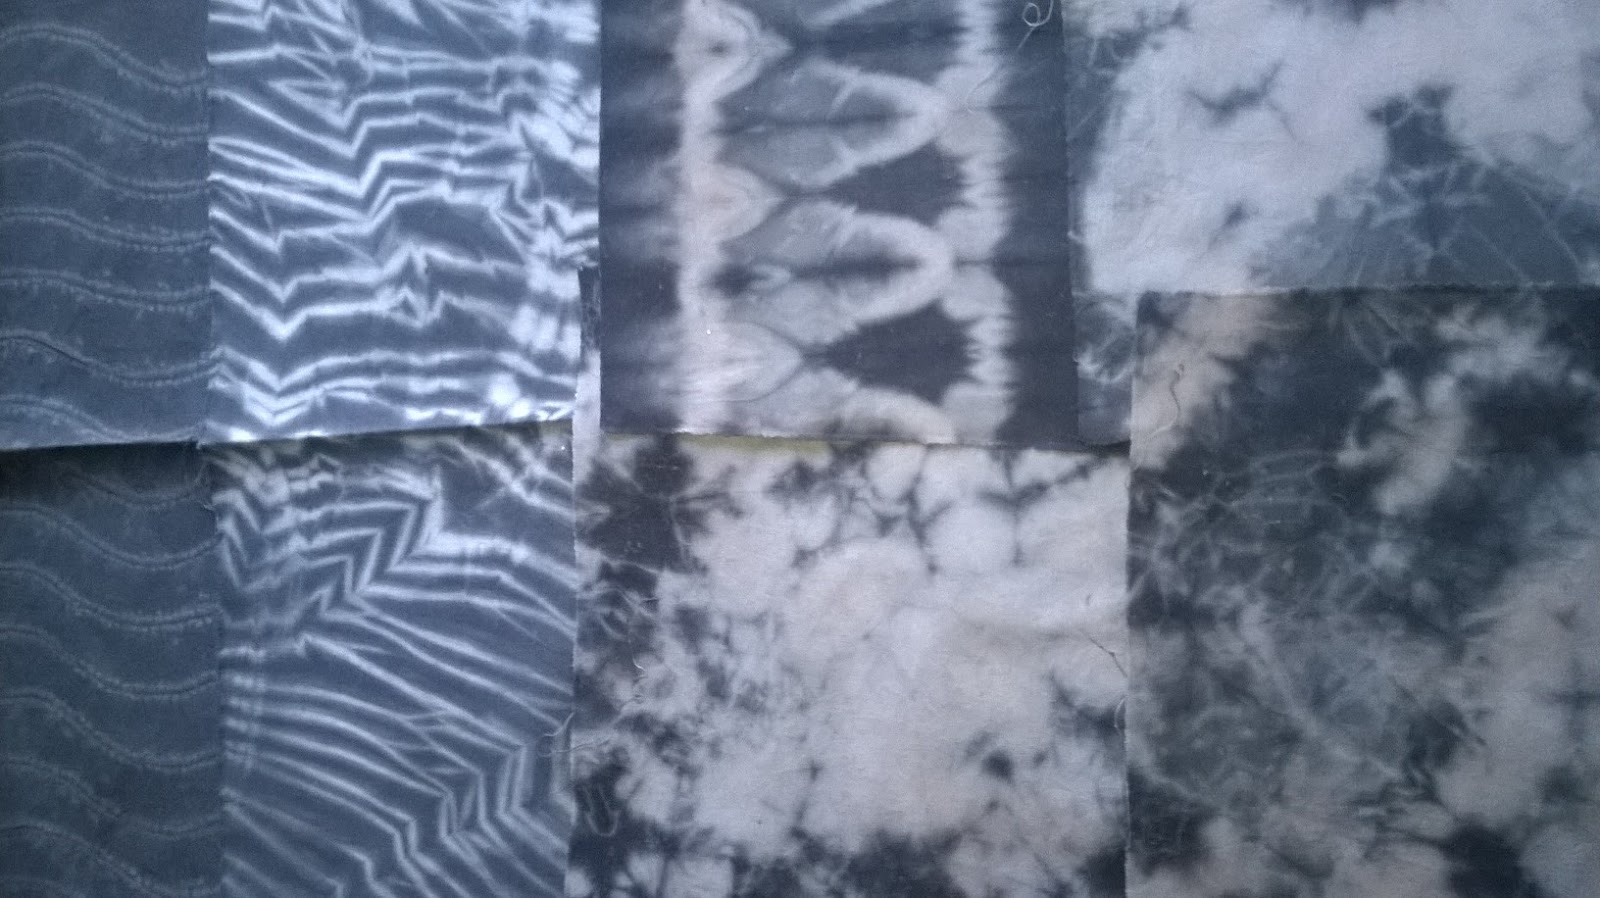
The following fabrics were all stitched, clamped, or wrapped in an attempt to create darker shibori dyed fabrics. I was better pleased with how the dyeing took in these samples. However since these pieces are all quite small, none larger than A4 sized, I think I will need to create more shibori fabrics, this time perhaps doubling the width to 22" or so.


Tuesday, March 29, 2016

Modul 2 - Chpaper 11: Stitched Samples based on paper designs - Stage A

The following samples are translations of 3 of my more complex paper designs into textile samples using my dyed, monoprinted, bleached and stitched fabrics, hopefully combining all elements into a sympathetic relationship. I have displayed both sides of the fabric samples, with the seamed and frayed edges at the front.

(i)


(ii)


(iii)


 My personal favourite is sample # (ii). I was very pleased with the translation of the Fibonacci sequaence paper design into fabric. In fact the textile version is much more interesting. Love the texture of the piece and enjoyed sitting with it and fraying the edges of the seams.

Friday, October 16, 2015

Module 2, Chapter 11: Machine stitching on bleached and monoprinted fabric

The following set of fabrics were machine stitched using cable and whip stitch in a hopefully sympathetic manner complimenting the previously painted and bleached fabrics.

(i) Cable stitched a previously 'failed' shibori dyed, then monoprinted, fabric. Black pearl cotton #8 in bobbin and white sewing thread in top. Bobbin case had all tension removed; no tension alteration on top. Zig zag stitch with feed dogs up; alternated width as I sewed; also moved fabric while sewing to create curved lines.


(ii) White fabric monoprinted with black fabric paint using bubble wrap. Stitched using zig zag up and down fabric, curving around circles, while adjusting width and length of stitch; feed dogs up. On the slightly lighter section of the fabric I zigzagged around the barely visible circles. Might repeat this in a larger piece of fabric but using lowered feed dogs and a darning foot for free machining zig zag. This was fun to do, reminded me of vermicelli stitching in quilting.


(iii) Cable stitched white PC#8 on black bleached commercial fabric; black sewing thread on top; feed dogs up. No tension in bobbin.  3 step zig zag stitch, altering length and width. Then added layers of overstitching using white sewing thread and same machine stitch. Really like the toned effect created by the lighter layers of stitching with sewing thread. Will likely repeat this and use in final project.


(iv) Black on black: Fabric dyed, more charcoal than black, (it looks blue in the photograph but is actually a rather dark charcoal!)cable stitched using black PC#8 in bobbin and black sewing thread on top; feed dogs up. 3 step zig-zag (#4 on machine). Altered length mostly and moved fabric while stitching to create curves.


(v) Black whip stitch on white fabric: Using the same bobbin as used for cable stitch, ie the tension removed entirely, I placed a bobbin of ordinary black sewing thread in the case and used white sewing thread on top, tightening the upper tension to its tightest (10), I machined zig zag quite quickly as I sewed, moving fabric to create curves and altering length and width as I went.

All in all I am quite pleased with my fabric samples and look forward to creating larger pieces for my final project. I am beginning to overcome my fear of whip stitch and cable stitch. This time there were no difficulties sewing the samples.

Wednesday, October 14, 2015

Module 2: Chapter 11 - Further Design Exercises

The following design exercises were created from paper made for an earlier chapter in this module. A variety of strips were cut up and arranged and rearranged into different patterns. 
The series of designs incorporated different tonal effects, as follows.

(i) Extremes of tone in bold, large areas:


(ii) Dark toned papers together.


(iii) Light toned papers together:


(iv) Medium toned papers, smaller shapes and increased pattern effect:


(v) Lighter, greyer tones, mixing black and whites mixed up in tiny fragments:


(vi) More complex design ideas, combining different blocks:


The following is based on the Fibonnacci sequence:


'Stack and Whack' Designs:

In the following set of blocks I began by creating different sets of patterned designs and then cut them into the same shapes - squares and triangles. I stacked some of the squares on top of each other, and cut the squares in half. The pieces were swapped around to create different patterns. This was my favourite paper exercise and I love the completed designs, and will use them in the next stage of this chapter.