Friday, June 21, 2013

Chapter 11- Disintegration using a bonded technique

For the following sample I created a bonded fabric varying the the amounts of bits and pieces of torn fabrics, ribbons, threads, etc so that I could cut out shapes showing varying levels of growth / disintegration throughout the entire piece. I also wanted to experiment with an overall fabric design. The background fabric is a space dyed silk habutai.

Thursday, June 20, 2013

Chapter 11 - More growth and disintegration samples

The following samples illustrate how I used hand embroidery stitches to display growth and disintegration processes. The blackwork sample was worked on 28 count linen with space dyed cotton threads. The series of free cross stitch samples were worked on hand dyed silk using wool and cotton embroidery threads.

Thursday, February 21, 2013

Chapter 11 - Growth and Disintegration Samples

The following samples are the result of a series of experiments illustrating ways of making a shape disintegrate by using stitchery. Samples 1,2+3:First sample shows large cut-out of shape, followed by sample with smaller cut-out and more outline stitchery filling shape area, and last sample of very small cut-out and lots of stitching. All worked on space dyed cotton poplin and stitched with simple running stitch using stranded cotton. Samples 4,5+6 worked on cut-out shape with shape appearing to become larger through lines of stitching. [Fabric and thread as above.] Sample #7: Long, frayed edges left and then held in place using free machine stitching. Sample #8,9+1: The following set of samples illustrate how a shape can appear less solid using lines of free machine stitching. Samples worked on old cotton/linen table cloth which was space dyed and stitched with space dyed machine rayon thread. Samples #11,12,13+14: The following samples show how a shape can be made less solid using bonding techniques, sprinkling few bits and pieces as the series went on.

Tuesday, December 4, 2012

Chapter 11 - Third Thoughts: Different Ways of Disintegrating a Square of Fabric

For the following exercise I used squares of loosely woven white calico, initially cut into four inch squares. Sheet #1:
The above page shows the results of my initial three fabric experiments. The top two samples are simple squares folded, and then cut. The bottom sample uses the negative pieces left over from the middle sample.
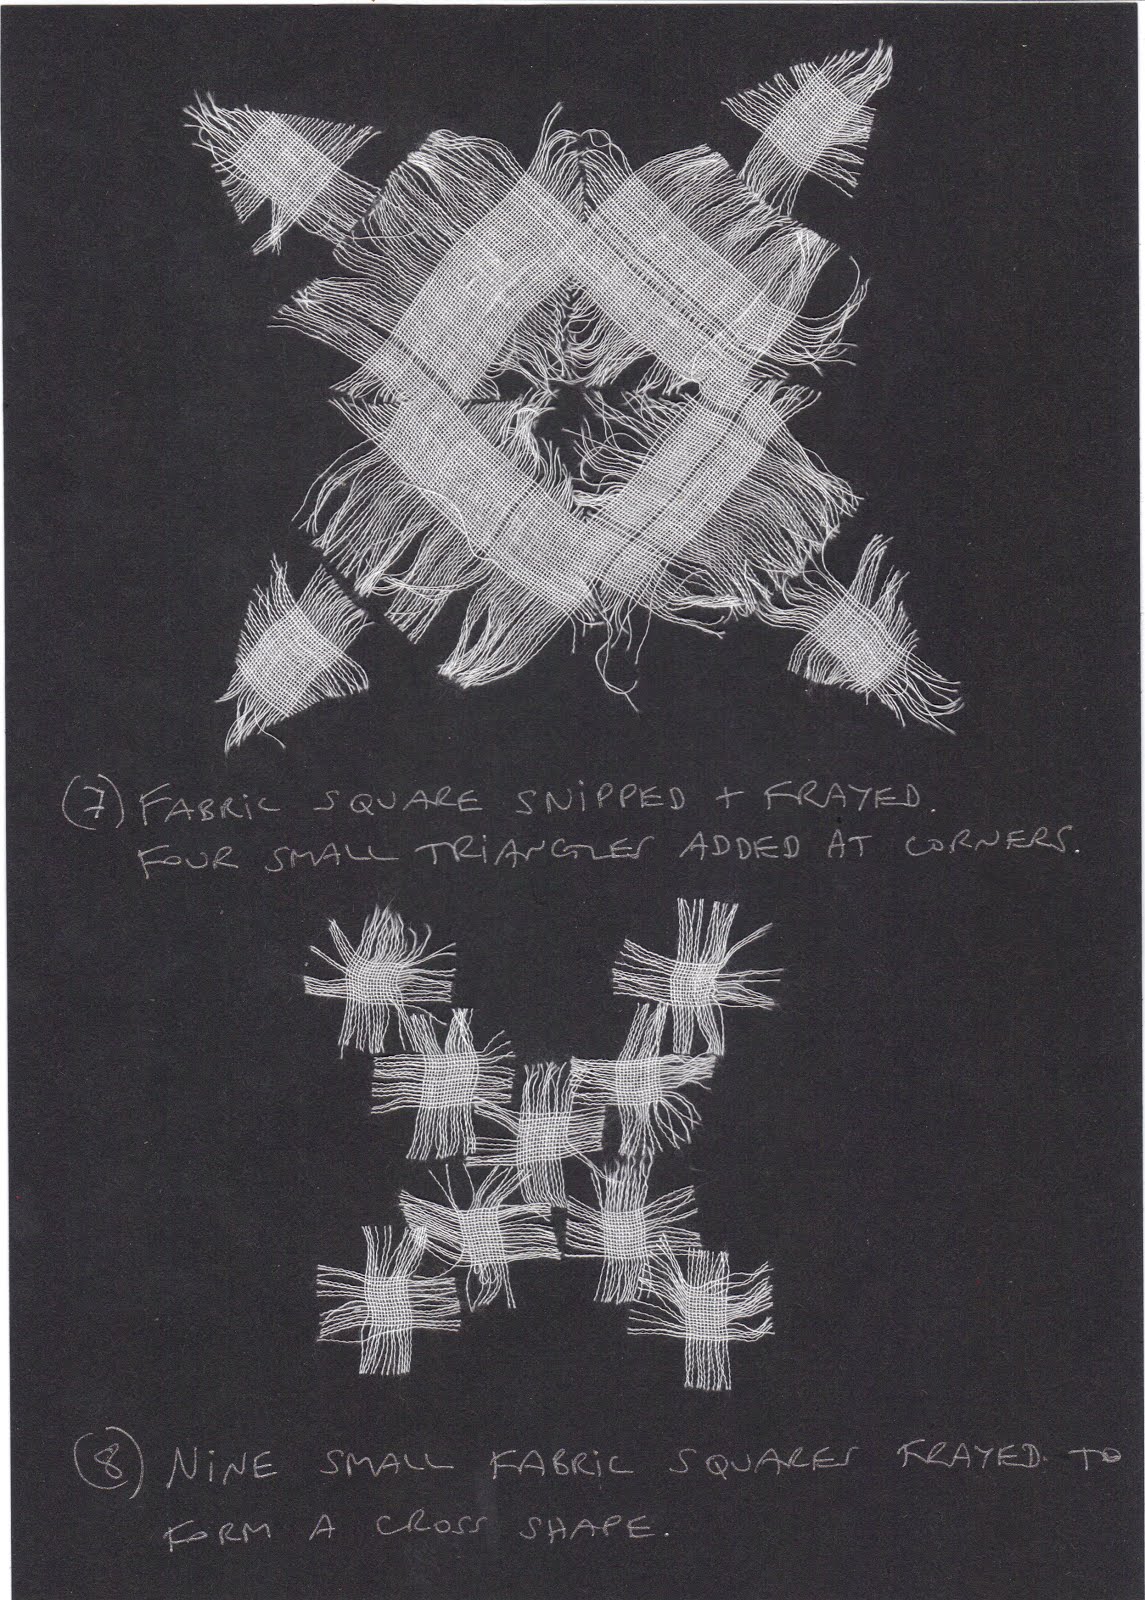
The second set of samples shows my initial attempts at fraying the cut squares. The top sample was snipped as per text instructions and then cut edges were frayed. The middle sample was folded first, then cut and frayed. The bottom sample is a simple square, frayed, then turned on the diagonal. Four small triangles were placed in the angles.
The third set of samples includes a fabric square snipped and frayed with four small triangles added to corners. Beneath that is a sample consisting of nine small squares frayed and then arranged to form a cross shape.
The next set of samples consists of two frayed rectangles placed diagonally across each other to form a cross shape, followed by a fabric square, folded, cut and then all the negative shapes were used.
The first of the final two samples is quite interesting in that I began by creating the 'fabric' by bonding some tiny scraps of calico and lots of threads between two layers of Bondaweb. The two arms of the cross were then laid one on top of the other. The last sample is a square snipped as directed in text and then cut and edges frayed. All in all a fun and relaxing set of samples to make! The loose weaved fabric made it very easy to carry out the fraying aspect, and I really like the disintegration which results. Personally I would like to carry this idea into a sort of contemporary interpretation of seventeenth century whitework samplers.

Wednesday, September 5, 2012

Chapter 11: Second Thoughts - Paper Shapes

In the first page of designs of paper shapes I used a scissors to cut the shapes, cutting into it further each time in order to disintegrate it more.
The next set of paper shapes were torn, and the ragged edges gave the whole design a much more interesting appearance.

Saturday, September 1, 2012

Ch. 11 -Resolved Sample: First Thoughts - Paper Experiments

First Thoughts -Paper Experiments Sheet #1
Details: Top left: Cartridge paper punched with blunt puncher, so had to push holes out with fingers, tearing in process, then folded paper, punched and pushed again a couple of times, crumpled, flattened out, crumpled, flattened, repeatedly. Top right: Cartridge paper dampened with water, then crumpled rubbing between hands until ripped. Middle left: Pieces torn into strips then woven together, held in place with glue stick. Middle right: Crumpled, punched, rubbed. Bottom left: Crumpled, then put under ring binder machine a few times, crumpled again until torn. Bottom right:Crumpled, ring binder again around edges and through cente, crumpled again until ragged. Sheet #2:
Details: Top left: Free-machine stitching on black paper, crumpled, then wet and rubbed until torn. Top right: Free-machine stitched with no thread, crumpled, wetted out, rubbed between hands. Bottom left: Stitched with automatic stitches, crumpled, wetted, torn. Bottom right: Torn pieces of paper, pieced together with free-machine embroidery. Sheet #3:
Details: Top: Tracing paper, doubled over, with bits of thread sandwiched between, then free-machined, burned, rubbed. [This is my favourite sample - love the disintegrated look.] Bottom: As above, but stitched with automatic patterns.

Tuesday, August 14, 2012

Chapter 10: Inlay Appliqué

This chapter was something of a challenge, although once I figured out what I needed to do, it was pretty straightforward. Sometimes the beginnings of new sections, with their call for a new approach to producing samples is a little nerve-wracking, at least until one figures out what one needs to do. Having stitched my insertion stitch sampler (see previous post), I began to work on the three individual samples. Simple Counterchange Sample #1 – paper design Since this was my first sample for this chapter and I had no idea what I was supposed to do, I decided it would be wise to begin with a paper design of my first sample. Having created this, I was much more confident about what was required.
Actual fabric sample: Using richly hued tones of my chosen colour scheme, I bonded bits of threads and fabrics, including dyed muslin torn into pieces, to previously painted Bondaweb. This is a method of background fabric construction which I love, not least for the sheer richness of the completed fabric. I then cut out the design from each piece and swapped them around to form the design. Next came tacking all the pieces to tissue paper, followed by joining the edges with a simple twisted insertion stitch. The designs were embellished with parallel rows of running stitch, and completed with blanket stitch around the outer edges.
Counterchange Sample #2 For this sample I used pieces of the first two bonded felt backgrounds as well as creating two new ones – four different bonded felt fabrics in total. The design I used was taken from Design Sheet C, ‘i’. (See earlier post.) A quarter of the design was cut from each piece and swapped around. I joined the edges with a simple cross stitch and completed the sample with blanket stitch around the outer edges.
Counter-Interchange Sample #3 This sample is based upon a previous exercise from Design Sheet B – exercise vi. (See previous post.) Felt is bonded as in other samples. Shapes joined with simple twisted insertion stitch, while the four squares were joined with machine feather stitch. Individual sections embellished with a variety of machine embroidery stitches and free machining. Finally blanket stitched outer edges to pull the sample together into a cohesive whole.